A slicker brush for dogs is one of the most widely sold grooming tools and one of the most misused. Used well, it clears loose undercoat before it turns into knots and gives you a weekly look at your dog's skin. Used with too much pressure, or on the wrong coat, it leaves sore, irritated skin and a dog that hides when the brush comes out. This guide covers what the tool is for, which coats it suits, how to hold it, and when to stop.
What a Slicker Brush Is and What It Actually Does
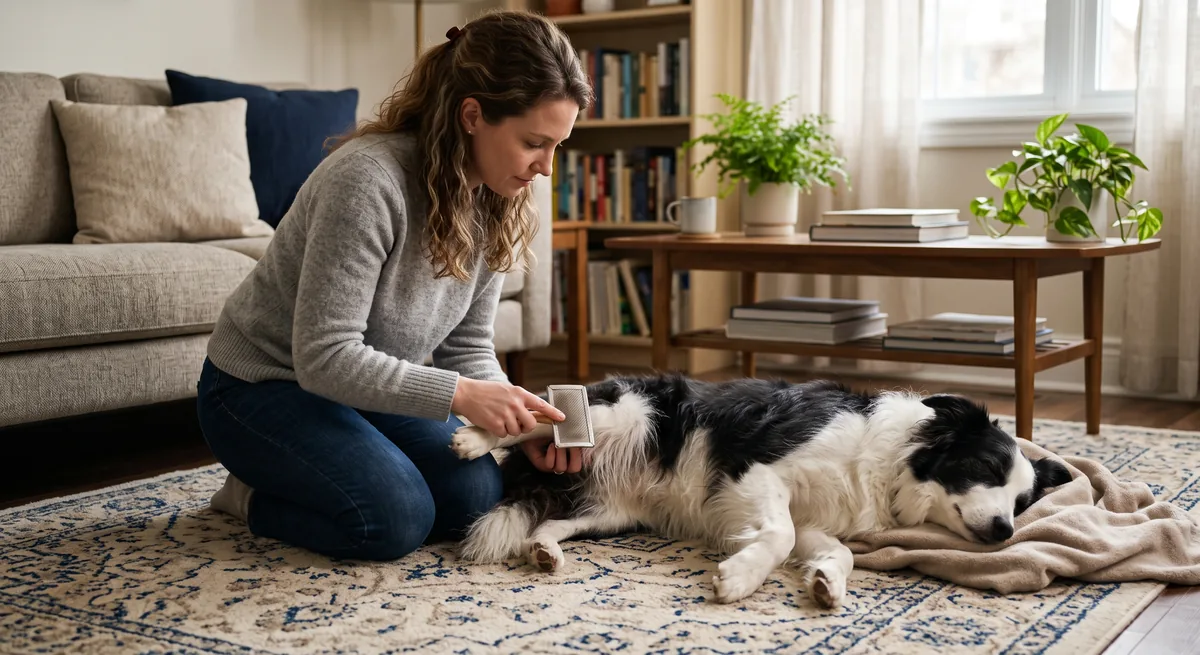
A slicker brush is a flat or slightly curved pad covered with many fine wire pins, usually bent at a shallow angle, mounted on a handle. The pins are short and closely spaced, which lets them pass through the outer coat and lift out hair that has already shed but is still trapped against the body. That trapped hair is what turns into felted knots if it is left alone, so a slicker brush is a preventative tool more than a repair tool.
The tool has one job it does very well: pulling loose undercoat and light surface tangles out of a coat that is long enough to hold them. It does not cut hair, it does not thin a coat, and it is not designed to force its way through a solid mat. Owners who expect a slicker brush to dissolve a dense knot usually end up pulling skin, which is where grooming sessions start going wrong.
Compared with a pin brush, the pins on a slicker are much finer, much closer together, and they sit at an angle rather than straight up. Compared with a bristle brush, a slicker reaches deeper instead of polishing the surface. Compared with an undercoat rake, a slicker is gentler and covers a wider area per stroke but removes less bulk from a heavy double coat. Our broader dog brush guide walks through how those categories fit together.
Most slicker brushes fall into three builds. A flat rigid pad is the classic version and gives the most control. A flexible or curved head follows the contour of a leg or shoulder and puts less pressure on any single point. A self-cleaning model has a button that retracts the pins so the collected hair lifts off in one sheet, which is convenient during heavy seasonal shedding but adds moving parts that can loosen over time.
"Slick Brush" or "Slicker Brush"? Why You See Both Spellings
A lot of owners type "slick brush for dogs" into a search box, and the results that come back are slicker brushes. That is not a coincidence, and it is not a second product hiding behind a shorter name. "Slicker brush" is the term the grooming trade uses, and it is the wording you will find in the coat-care guidance published by the American Kennel Club. "Slick brush" is the same request typed the way it sounds, so if that is what brought you here, everything on this page applies to the tool you were looking for.
It is worth knowing because the shortened spelling can lead you sideways. Search "slick brush" on a marketplace and the listings that surface are a mixed bag: real slicker brushes, rubber curry mitts, deshedding blades, and smoothing brushes sold for human hair. Those tools do genuinely different jobs on a dog. A curry mitt polishes a smooth coat and lifts loose hair off the surface. A deshedding blade pulls undercoat out of a double coat. Neither is a substitute for the fine bent wire pins that define a slicker, and neither should be bought on the assumption that the words mean the same thing.
Two other names cause the same mix-up. A pin brush has widely spaced, straight pins with rounded tips and is built to move through a long coat without breaking it, which is a different job again. A soft or "pillow-face" slicker is still a slicker, just with more give in the pad and finer pins, and it suits thin coats and puppies better than a rigid one does. When you compare products, ignore the name on the listing and look at the head: closely set, fine wires, angled slightly back from the pad, mounted on a cushion. If that is what you are looking at, you have found a slicker brush, whatever the seller has called it.
Which Coats Suit a Slicker Brush
Coat type decides whether a slicker brush is the right tool or the wrong one, and this is the single most common mistake in home grooming. A coat that traps shed hair benefits from a slicker. A coat that sheds straight onto the floor usually does not need one at all.
Long and silky coats, feathered coats, curly and wool-textured coats, and thick double coats all hold shed hair inside the coat rather than releasing it. Those are the coats where a slicker brush earns its place. Very short, smooth, single coats release hair directly, so a rubber curry mitt or a soft bristle brush is usually kinder and just as effective. On a genuinely bald or very thinly coated dog, fine wire pins have almost nothing to work through and sit directly against skin, which is a recipe for irritation.
Puppies are a special case. A young dog's coat is often soft and easy to manage, so the goal in early sessions is not efficiency but tolerance. Short, calm, rewarded sessions teach a puppy that being handled is normal, which pays off for years. If you are building a first kit, our puppy grooming tools guide covers what is worth buying at that stage and what can wait.
Senior dogs also need a lighter hand. Skin becomes thinner and less elastic with age, joints may be sore, and standing still for long periods can be uncomfortable. Shorten the session, support the body, and avoid working over bony areas such as hips, elbows, and the spine with any pressure at all.
Slicker Brush Compared With Other Grooming Tools
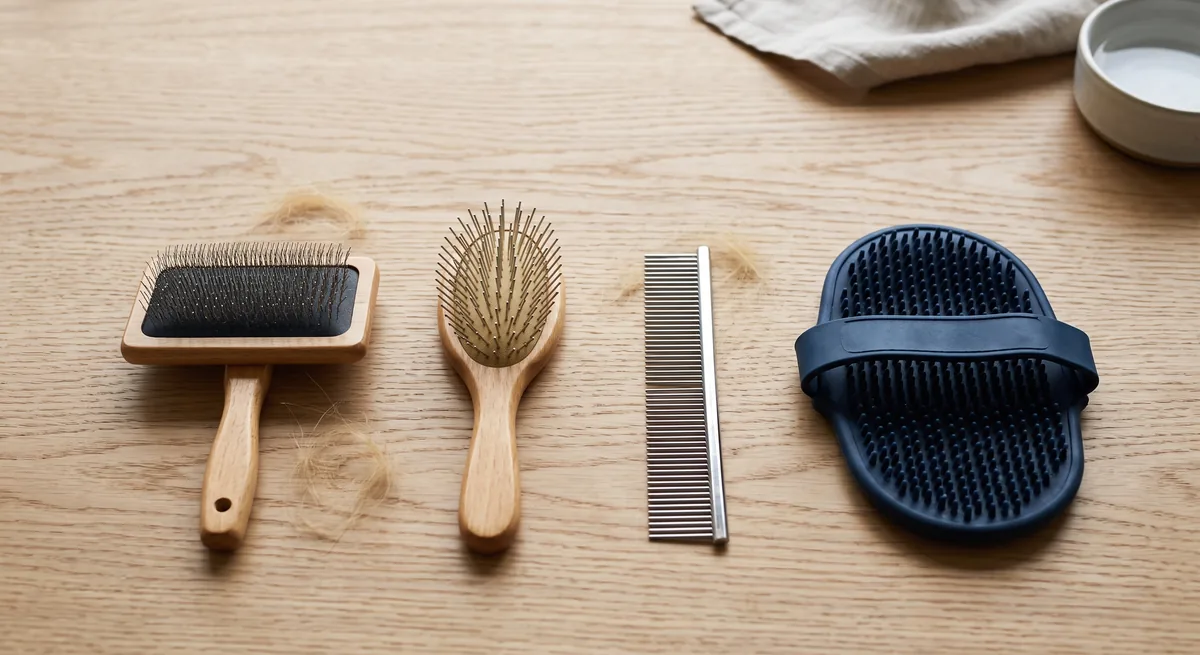
No single brush handles every job, and a slicker brush is at its best as one part of a small set rather than a lone tool. In practice, most owners get further with a slicker plus a metal comb than with three different brushes and no comb. The comb is what tells you whether the coat is genuinely clear.
Here is how the common options compare in everyday use. If you want the full inventory, our pet grooming tools for dogs and canine grooming tools guides go through each category in more detail.
A deshedding tool with a blade edge is a different device again, and it is easy to overuse. Where a slicker brush lifts loose hair, a bladed deshedder strips undercoat aggressively and can damage guard hairs if it is dragged over the same patch repeatedly. Our review of the Groomi tool for dogs looks at that category specifically.
Grooming also involves more than the coat. Nails, teeth, and skin all deserve routine attention, and a brushing session is a natural time to check them. If any of those need work, see our guides on the nail trimmer for dogs, the dog toothbrush, and the wider set of dog grooming instruments.
How to Use a Slicker Brush Safely, Step by Step
Technique matters more than the brand printed on the handle. The same tool can be comfortable or painful depending entirely on pressure, angle, and how long you stay in one place.
1. Set the dog up first. Choose a non-slip surface, work at a height that does not force you to lean over the dog, and start when the dog is already calm rather than after a walk when they are still wound up. A dog that cannot balance will fidget, and fidgeting is what turns a controlled stroke into a scrape.
2. Check before you brush. Run your hands over the whole body first. You are feeling for lumps, scabs, sore spots, hot patches, and any knot that has already tightened. Finding these with your fingers is far kinder than finding them with wire pins.
3. Work in small sections, from the ends inward. Lift a section of coat with your free hand, brush the last few centimetres of hair, then move gradually closer to the skin. This is called line brushing, and it stops you from dragging a full-length pass through a tangle you have not seen.
4. Keep the pins moving and keep them flat. Hold the brush loosely so the pad lies along the coat rather than digging in at the corner. Let the weight of the tool do the work. If you are pressing hard enough to see the skin dimple, you are pressing far too hard.
5. Follow the direction of hair growth. Brushing against the grain is sometimes used by professionals for specific coat types, but as a default it increases discomfort and pulls more. Going with the grain is the safe habit.
6. Finish with a comb. A metal comb run through the same section is the honest test. If the comb glides, the section is clear. If it stops, there is still something there, and more slicker brush passes over a stuck comb is exactly the wrong response.
7. Stop while it is still going well. Five good minutes repeated often beats a forty minute session that ends with a stressed dog. Ending on a reward while the dog is still relaxed is what makes the next session easier.
Brush Burn and Other Skin Problems to Avoid
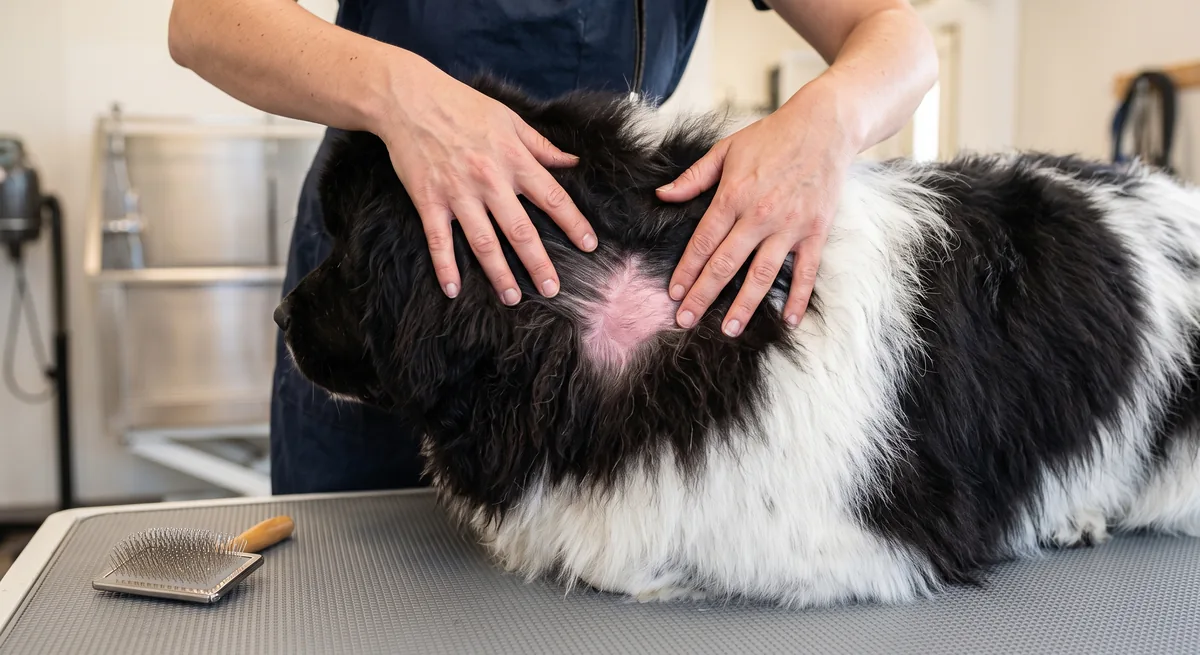
Brush burn is the term groomers use for the red, irritated, sometimes grazed skin left behind when a brush is used with too much pressure, in one spot, or on a coat it does not suit. It is friction damage, not a burn in the heat sense, and it is entirely preventable. It usually appears in the thin-skinned places: the belly, the inside of the thighs, the armpits, and around the face and ears.
The warning signs show up during the session, not after it. A dog that suddenly turns its head, tenses, licks its lips repeatedly, freezes, or tries to move away is telling you something. Pink or red skin under the area you have been working, small scratch lines, or flakes of skin coming away with the hair all mean stop now and reassess the tool and the pressure.
If irritation has already appeared, leave that area alone, do not bathe it with anything you have not been advised to use, and let a veterinarian look at it if it is more than mildly pink, if it is not settling, or if the dog keeps licking or scratching at it. Persistent itching, sores, hair loss, a strong smell, or swelling are veterinary questions rather than grooming questions. Skin lumps found during brushing are the same: our note on skin tags on dogs explains why anything new is worth a professional look rather than a home diagnosis.
Some skin problems are not caused by the brush at all and only become visible because brushing parts the coat. Parasites, allergies, and fungal or bacterial infections all show up this way. Treatment for those belongs with your veterinarian, and any medicated product should be used on their advice. Our overviews of medicated dog shampoo, antifungal dog shampoo, and flea shampoo for dogs explain what those categories are for, not which one your dog needs.
Tangles, Mats, and When to Put the Brush Down
There is a real difference between a tangle and a mat, and treating them the same way is how dogs learn to hate grooming. A tangle is loose, movable, and will come apart from the ends with patience. A mat is dense, felted, sits flat against the skin, and does not move when you push it.
For a light tangle, hold the base of the hair between your fingers so the pull lands on your hand rather than on the skin, then work the outer ends free with short strokes before moving inward. A comb finishes the job. Never anchor the hair with one hand and drag the brush hard with the other, because all of that tension ends up on the follicle.
For a true mat, stop. Pulling a solid mat with wire pins hurts, can tear skin that has been drawn up into the knot, and rarely works. Household scissors are worse: skin lifts into the base of a mat, and cutting blind is a common cause of serious grooming injuries. A professional groomer with clippers can usually remove a mat quickly and safely, and a badly matted coat may also need veterinary attention for the skin underneath.
Prevention is far easier than repair. Mats form fastest where there is movement and friction, so the areas behind the ears, under the collar, in the armpits, along the trousers of the back legs, and around the tail deserve attention every single session. Wet coat that dries without being brushed out is another reliable way to create mats, which is why a bath is not a substitute for brushing. Guides on dog shampoo and hypoallergenic dog shampoo cover the washing side of that routine.
How Often to Use a Slicker Brush
Frequency follows the coat, not the calendar. A long or curly coat that is prone to tangling generally needs attention every day or close to it, because a knot that forms today is far easier to clear today than next week. A medium coat with feathering often does well every two or three days. A thick double coat may only need a weekly pass for most of the year and then daily help through a heavy seasonal shed.
Short daily sessions are almost always better than one long weekly one. They keep the coat ahead of the problem, they keep the dog relaxed because nothing hurts, and they take less total time. They also give you a repeated, low-effort look at the skin, which is how most owners notice a change early.
Season matters as well. Many double-coated dogs shed heavily as day length changes, and that is the period when a slicker brush combined with a rake earns its keep. Outside that window, the same intensity of brushing is unnecessary and can be irritating. Let the coat tell you: if very little hair is coming out and the comb glides, you have done enough. The American Kennel Club's home grooming guidance makes the same point, and recommends asking a veterinarian or groomer when you are unsure which routine suits your dog.
Choosing and Maintaining a Slicker Brush
Price is a weak signal here. What matters is pin quality, pad flexibility, handle comfort, and size relative to your dog. Fine pins with smooth, rounded tips are gentler than thick pins with sharp ends, and a pad that flexes slightly spreads pressure instead of concentrating it. Coated tips exist and can help nervous dogs, though the coating can wear away and should be checked.
Size should match the dog and the area. A wide pad covers a large flank quickly but is clumsy around a face, ears, or the back of a small dog's legs. Many owners of long-coated small breeds end up preferring a smaller head simply because it can reach the places where mats actually form.
Run through this checklist before buying:
- Press the pins gently against your own forearm. If they scratch you, they will scratch your dog.
- Check that no pin is bent outward or missing its tip.
- Flex the pad. Some give is good; a board-stiff pad concentrates pressure.
- Hold the handle as you would in use. A handle that forces a tight grip leads to heavier pressure.
- Match the head size to the smallest area you actually need to reach.
- Decide honestly whether a self-cleaning mechanism is worth the extra parts for your routine.
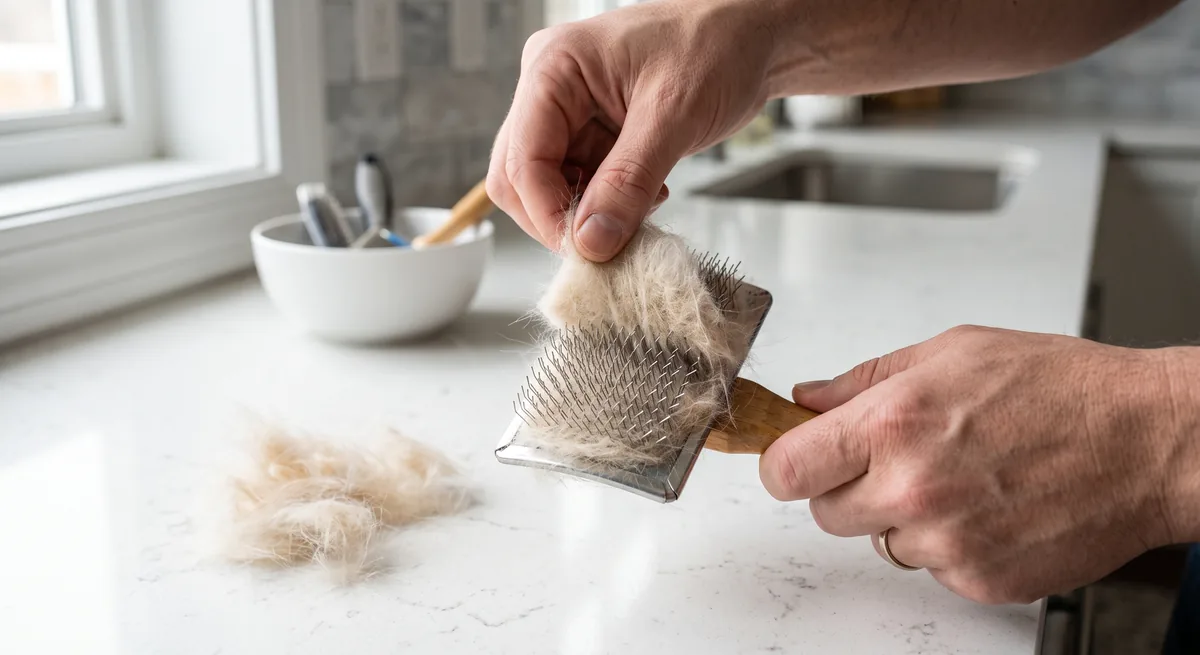
Maintenance is simple and easy to skip. Clear the hair out after every session rather than letting it pack down between the pins, because a clogged pad stops working and starts dragging. Wipe the pins with a damp cloth and let the brush dry fully before storing it, especially if it has a wooden handle. Replace the brush when pins bend, tips wear rough, or the pad loses its shape. A worn slicker brush is one of the quieter causes of a dog that has suddenly decided grooming is unpleasant.
Finally, keep the tool near where you actually groom. The best routine is the one that happens, and a brush kept in a cupboard upstairs gets used far less than one that lives next to the sofa. Our roundups of dog grooming tools and dog tools for grooming can help you build the rest of the kit around it.
Frequently Asked Questions
What is a slicker brush used for on a dog?
It is used to lift loose shed hair and light surface tangles out of a coat that traps them, which helps stop knots forming. It is a maintenance tool for the coat, not a device for cutting hair or forcing apart a dense mat.
Is a slicker brush suitable for short-haired dogs?
Usually it is not the best choice. A very short, smooth coat releases hair directly, so a rubber curry mitt or soft bristle brush is normally gentler and works just as well. Fine wire pins on a thin coat sit close to skin and can cause irritation.
How do I stop a slicker brush from hurting my dog?
Keep the pad flat against the coat, use light pressure, keep the brush moving instead of working one spot, brush in the direction of hair growth, and work in small sections from the ends of the hair inward. Stop at the first sign of tensing, flinching, or reddened skin.
What is brush burn and how do I avoid it?
Brush burn is friction irritation of the skin caused by too much pressure, repeated passes over one area, or using a brush that does not suit the coat. Avoid it by using light strokes, moving on quickly, skipping bony or thin-skinned areas, and checking the skin as you go.
Can a slicker brush remove a mat?
It can ease a loose tangle, but it should not be forced through a dense felted mat. Skin is often drawn up into the base of a mat, so pulling with wire pins hurts and can tear skin. A professional groomer can usually clip a true mat out quickly and safely.
How often should I use a slicker brush?
It depends on the coat. Long, curly, and heavily feathered coats often need attention daily or every other day, while a thick double coat may need a weekly pass plus daily help during a heavy shed. Short frequent sessions work better than one long session.
When should a veterinarian look at my dog's skin?
Ask a veterinarian about sudden hair loss, persistent itching or licking, sores, scabs, a strong smell, swelling, visible parasites, new lumps, or any area that stays sore after you stop brushing. Grooming often reveals these problems, but treating them is a veterinary decision.
Is a slick brush for dogs the same thing as a slicker brush?
Yes. "Slick brush" is how many owners spell the request, but the tool on the shelf is a slicker brush: a cushioned pad set with fine, closely spaced wire pins bent slightly back from the surface. There is no separate grooming tool sold as a "slick brush" by a recognised manufacturer, so search results for the shorter spelling return slicker brushes plus a scattering of unrelated products.
If I search for a slick brush, what else might I get by mistake?
Listings under that wording often mix in rubber curry mitts, deshedding blades, pin brushes and smoothing brushes made for human hair. Those do different jobs and some are unsafe used the way a slicker is used. Judge the head rather than the name: closely set fine wires angled back from a cushioned pad is a slicker brush, whatever the listing calls it.
Shop Pet Supplies
Free worldwide shipping on every order. No minimum purchase required.
Shop Pet Supplies →