If you are looking for the best clippers for grooming dogs, this comprehensive guide covers everything you need to know. Whether you are a first-time pet owner or an experienced one looking to upgrade, you will find practical advice, safety tips, and honest comparisons below.
What Clippers for Grooming Dogs Do and When You Need Them
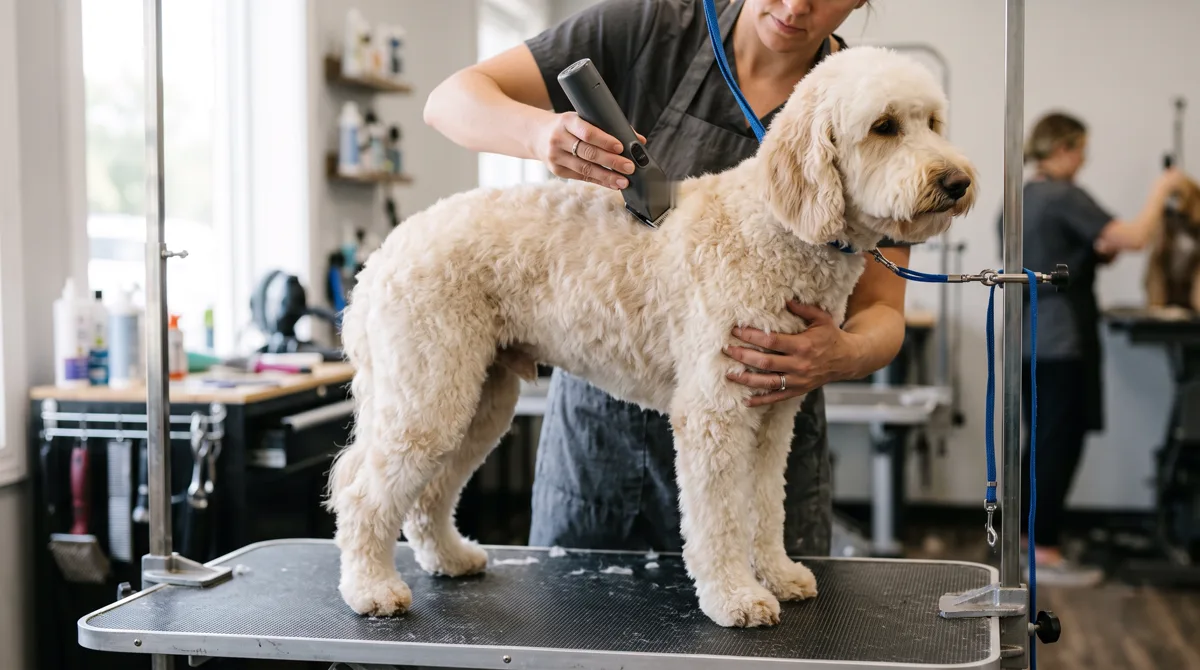
Clippers for grooming dogs are motor-driven cutting tools that take a coat down to a set length in one pass, which is something a brush or a pair of scissors cannot do quickly or evenly. A dog clipper has a body that houses the motor, a blade or blade set at the front, and usually a set of snap-on guard combs that leave the coat longer than the bare blade would. Owners reach for clippers when a coat has grown past the point where a dog brush keeps it tidy, when hair between the paw pads starts collecting grit, or when a sanitary trim is needed to keep the rear end clean.
Not every dog needs clipping. Short, smooth-coated breeds shed and renew their coat on their own, and double-coated breeds such as huskies and golden retrievers are usually better served by a deshedding routine than by a clipper, because taking the outer coat down can change how it grows back. Clippers earn their place with dogs whose hair keeps growing: poodles and poodle crosses, cocker spaniels, shih tzus, bichons, terriers with long furnishings, and a great many mixed breeds. If you share your home with a miniature poodle or a teddy bear dog, a clipper will be part of life sooner or later.
Used well, a good pair of clippers makes home grooming faster, calmer, and cheaper over time, and lets you tidy feet, face, and sanitary areas between professional appointments. Used badly, the same tool leaves tramlines, nicks, and clipper irritation. The difference is rarely the price of the machine. It comes down to choosing the right type of clipper for the coat, understanding what the blade numbers mean, working on a properly prepared coat, and keeping the blade clean, oiled, and cool. This guide takes each of those in turn, so you can groom at home with confidence rather than guesswork.
Corded vs Cordless Clippers for Grooming Dogs
The first decision is power. Corded clippers plug into the wall, so they never fade halfway through a groom and tend to carry stronger motors for the money, which matters when you are pushing a blade through a thick or slightly overgrown coat. The trade-off is the cable: it snags on table legs, it limits where you can stand, and a fidgety dog may try to mouth it. Cordless clippers run on a rechargeable battery, usually lithium-ion in current models, and free you to move around the dog, work outside, or trim feet on the sofa. Their limits are run time, a battery that ages, and, in cheaper units, a motor that slows as the charge drops.
For more expert recommendations, check out our dog toenail trimmers guide.
Think about your typical session before you buy. A small dog that needs a fifteen-minute tidy of face, feet, and rear is well served by a cordless trimmer. A standard poodle or a doodle in full coat is a forty-minute job or longer, and a corded machine, or a cordless clipper with a spare battery, spares you the frustration of the motor dying halfway down the back. Some clippers run from both mains power and battery, which is the most flexible arrangement if the budget stretches to it. Whichever you choose, a clipper that feels balanced and quiet in your hand will get used more often than a powerful one you dread picking up.
The second decision is the blade system. Detachable-blade clippers, often called A5 style after a long-running professional model, accept a whole family of numbered blades that snap on and off, so you buy the machine once and add blades as your needs grow. Adjustable-blade clippers, common among cordless trimmers, carry a single blade with a lever that shifts between a handful of lengths, often marked in millimetres, and rely on guard combs for anything longer. Detachable systems suit owners who plan to do full body clips; adjustable systems suit tidy-ups, small dogs, and anyone who wants fewer parts to keep track of. Our dog grooming tools guide covers how clippers fit alongside brushes, combs, and scissors.
Dog Clipper Blade Size Chart
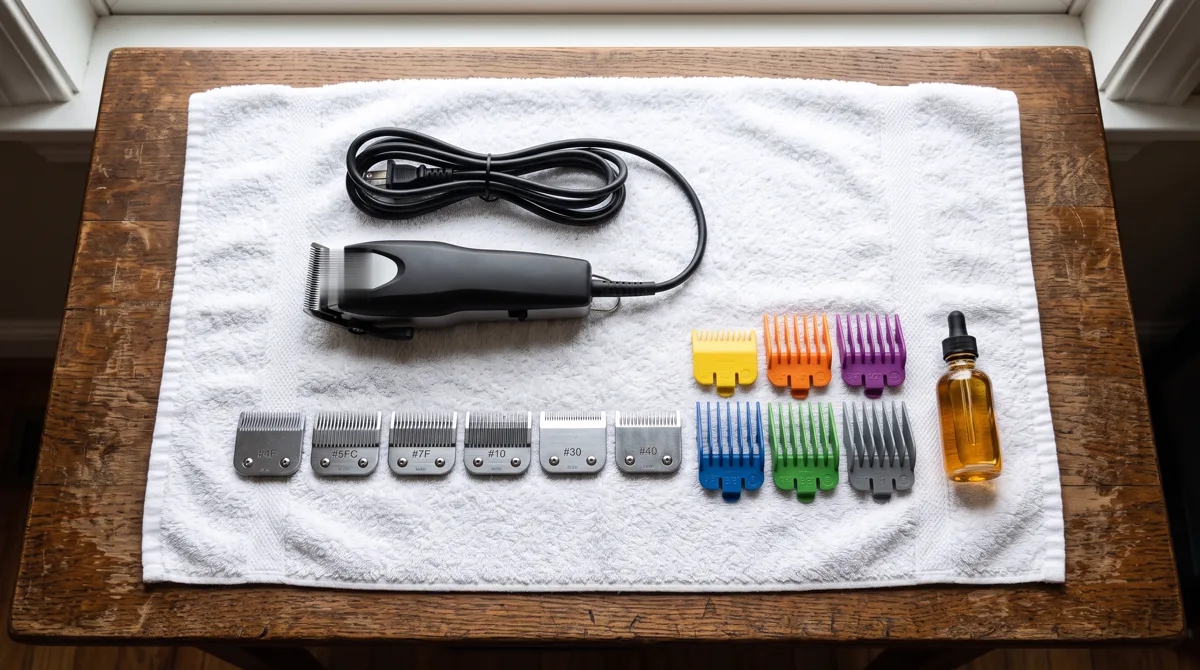
Blade numbers confuse almost everyone at first because they run backwards: the higher the number, the shorter the cut. A #40 is a near-surgical blade that leaves almost nothing behind, a #10 leaves about a sixteenth of an inch, and a #3 or #3F leaves roughly half an inch. The chart below follows the standard lengths listed for detachable A5-type blades in the Clipit clipper blade size chart. Those lengths assume you clip with the lie of the coat; clipping against the grain removes roughly one blade size more, so a #7 used against the hair leaves something closer to a #10 result.
The letter after a number matters as much as the number itself. A plain number (#7, #5, #4, #3) is a skip-tooth blade, with alternating long and short teeth that feed thick, dense, or slightly matted hair into the cutter quickly. The F or FC versions (#7F, #5F, #4F, #3F, short for finish or finish cut) have a full row of even teeth, cut more smoothly, leave a neater surface, and are the safer choice for most home groomers because fewer gaps between teeth mean less chance of catching skin. Professional groomers often keep both, roughing out a heavy coat with a skip-tooth blade and finishing with an F blade, as the Primpaws Grooming Academy blade guide explains.
Snap-on guard combs extend the range. A guard comb slides over a short blade (a #30 on detachable clippers, or the shortest blade or setting on most cordless adjustable clippers) and holds the cutting edge away from the skin so the coat is left longer, with each comb marked with the length it leaves. Because the comb keeps the blade off the skin, guard combs are the safest way for a beginner to take down a body coat, which is why the Chewy guide to clipping a dog at home recommends starting with a comb set. Their weakness is that they clog and skip on tangled or damp hair, which is one more reason coat preparation matters so much.
How to Choose Clippers for Grooming Dogs by Coat Type
Coat type decides your motor, blade, and comb needs more than breed name or body size does. Curly and wool coats (poodles, bichons, and most doodle crosses) grow continuously, mat easily, and demand a clipper with enough torque to push a #4F or #5F through dense hair without stalling. A two-speed detachable-blade machine is a sensible buy for these dogs, and a slicker brush and comb are non-negotiable companions, as our slicker brush for dogs guide explains.
You might also find our nail trimmer for dogs article helpful when shopping.
Silky drop coats (shih tzus, Maltese, Yorkshire terriers, Lhasa apsos) are fine and long. They clip easily with a modest motor, but the hair slips into the blade teeth so readily that an F blade and a light hand are needed to avoid taking off more than you meant to. Wire coats (schnauzers and many terriers) can be clipped for convenience, though clipping gradually softens the texture and dulls the colour, which is why show dogs of these breeds are hand-stripped instead. For a pet, a clipper still wins on time and comfort.
Double coats (German shepherds, huskies, Pomeranians, golden retrievers, corgis) are the group to be cautious with. The soft undercoat and the harsh guard hairs work together to regulate temperature, and clipping can leave a patchy, uneven regrowth. Owners of these breeds usually get better results from a deshedding tool and regular brushing, keeping the clippers to sanitary areas and paw pads only. Our FURminator guide covers the deshedding side in detail.
Small dogs and puppies deserve a note of their own. A compact, quiet cordless trimmer with a narrow blade is far easier to manoeuvre around a chihuahua's face or a puppy's feet than a full-size clipper, and the lower noise makes the first introductions easier, a point we expand on in our puppy grooming tools starter guide. Whatever the coat, buy from a maker that sells replacement blades and combs separately, because a clipper is only ever as good as the blade you can fit to it.
How to Use Dog Clippers Safely at Home
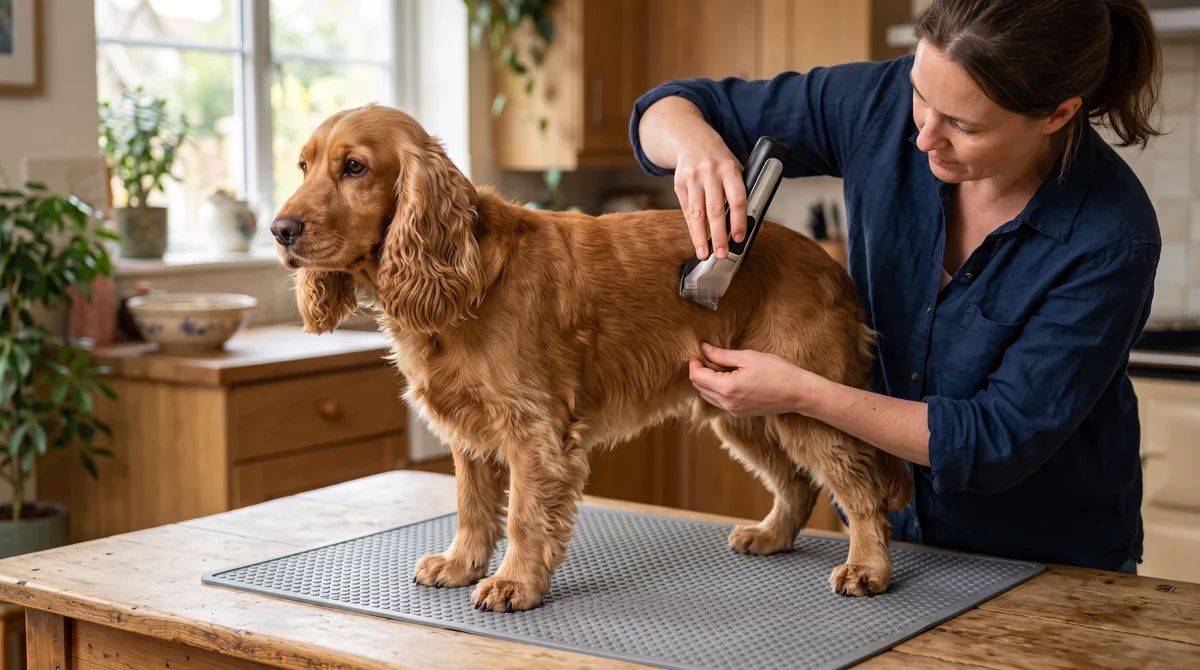
Preparation does most of the work. Bathe the dog with a suitable dog shampoo, dry the coat completely, then brush and comb through every part of it until a comb passes freely from skin to tip. Clipping a clean, dry, tangle-free coat gives a smoother finish and is kinder to the blade, because dirt acts like an abrasive and damp hair clogs the teeth. If a comb will not pass through, the mats need to come out first, and a badly matted dog is a job for a professional groomer this time, not a reason to press harder with the clipper.
Set up somewhere with good light and a surface the dog cannot slip on. A rubber mat on a sturdy table works well, but never leave a dog unattended on a raised surface, even for a moment. Let the dog hear the clipper running and feel it resting, switched on, against a shoulder before any cutting happens, and pair the whole experience with calm praise and treats. Several short sessions beat one long struggle, and the same positive reinforcement approach that works for training applies here. A dog that already struggles with anxiety may need the introduction spread over days.
Hold the clipper so the blade lies flat against the body. If the edge tilts into the skin it can nick or scrape. Move with the lie of the coat, from the head toward the tail and from the spine down the sides, using long, steady strokes and letting the blade do the work rather than pushing it. Start with the sanitary area and the paw pads using a #10, then choose the body length and fit a guard comb if a bare blade makes you nervous. Ears, armpits, the loose skin of the belly, and the folds of the face need your free hand to stretch the skin flat and slower, shorter passes.
Check the blade temperature often by touching it to the inside of your wrist. If it feels hot to you, it is too hot for the dog: stop, swap to a cool blade, or apply a blade coolant and let the clipper rest. When the body is done, brush and comb through again to find uneven patches and re-clip them, tidy the face, feet, and tail with round-tipped scissors, and look over the skin for any redness. A quick wipe-down with dog wipes removes loose clippings before they itch, and a nail trim with a proper nail trimmer for dogs rounds off the session.
Blade Care: Cleaning, Oiling, and Keeping Clippers Cool
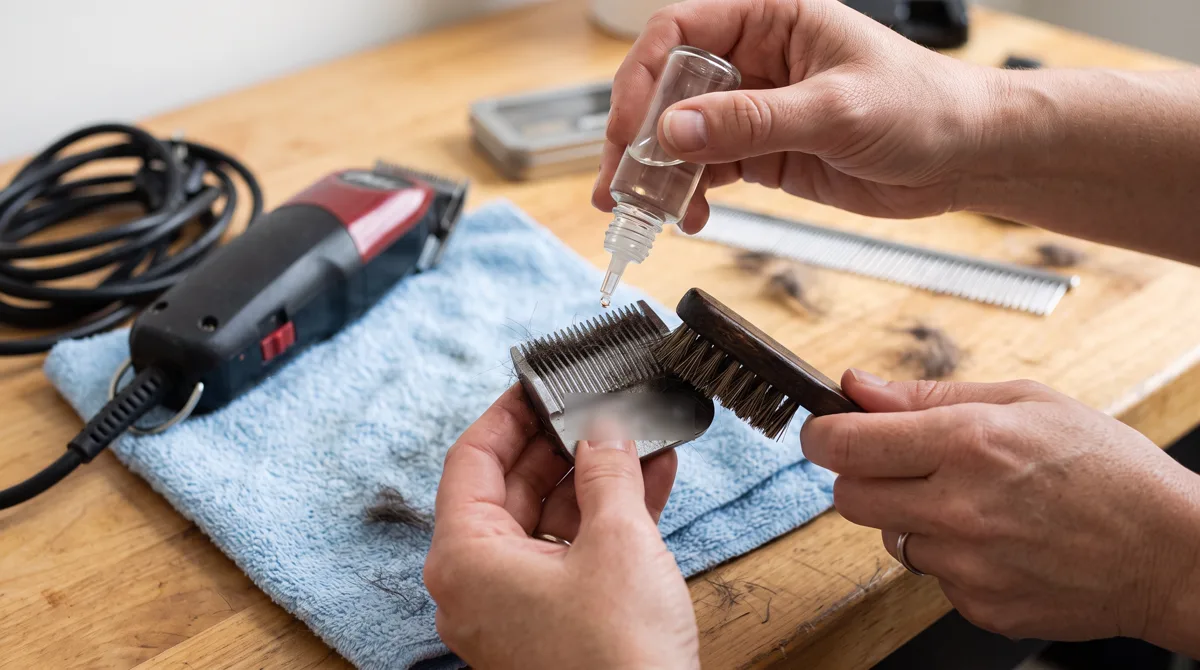
A clipper blade is two pieces of hardened steel sliding against each other at high speed. Friction makes heat, and anything that adds friction makes more of it: hair packed between the teeth, dried coat oils and dander, a dull edge, a dry blade, or worn parts inside the clipper. That heat is what causes discomfort and clipper irritation, dulls the blade faster, and strains the motor. The Groom and Kind guide to overheating blades traces almost every hot-blade complaint back to one of those causes, and every one of them is preventable.
Looking for more options? Our dog tools for grooming roundup covers additional top picks.
Cleaning comes first. After every session, and between dogs if you groom more than one, brush the hair out of the teeth with a small stiff brush or an old toothbrush, then wipe the blade with a cloth. A blade wash dissolves the residue that brushing leaves behind and is worth using every few sessions or whenever the cut starts to drag. Store the clipper, blades, and combs somewhere dry and out of the dog's reach, ideally in the case they came in, so the teeth are not knocked and the steel does not rust.
Oiling is the step most people get wrong, usually by doing too much of it. Oil before and during use, not only at the end. One tiny drop on the cutting surface, spread by running the clipper for a few seconds, is enough; a bead of oil run across the teeth simply drains through and onto the coat, as the Groomer to Groomer oiling guide points out. Detachable blades also have rails and a groove under the cutter that professionals oil once a day. Use clipper oil made for the purpose; spray coolants and general-purpose lubricants are not a substitute for it.
Cooling is about habits rather than products. On longer jobs, rotate between two blades so each has time to cool, rest the clipper between sections, and keep checking the blade on your wrist. Coolant sprays give short relief but do not replace oiling. Have blades sharpened or replaced when they start to drag, pull, leave lines, or need repeated passes over the same spot; a dull blade is the most common reason a clipper seems to stop working and is also the most common reason it runs hot. Blade tension springs and drive tips wear too, and a blade that chatters or rattles usually means one of them needs replacing.
Common Mistakes When Clipping a Dog
Clipping a wet or dirty coat is the mistake that ruins blades fastest. Grit acts like sandpaper on the cutting edges, and damp hair clogs guard combs so they skip and leave steps in the coat. Bath, dry, brush, and only then clip. Closely related is trying to clip through mats. A #10 can work under a mat that sits away from the skin, but a felted, tight mat on the belly or behind the ears needs a professional, and forcing a clipper through it is how dogs get nicked. If your dog has a sensitive skin history, a gentle hypoallergenic dog shampoo before clipping helps keep the skin calm.
Using human hair clippers on a dog is another common one. Human clippers are built for finer hair and softer skin, so their motors labour on a dense dog coat and their blades pull rather than cut. The teeth spacing on dog blades is designed around coat density and the risk of catching skin, which is why the two are not interchangeable even though they look similar. A dedicated dog clipper, even an inexpensive one, will outperform a good human clipper on a dog.
Technique errors are the rest. Pressing hard instead of letting the blade glide, clipping against the grain everywhere and ending up with a much shorter dog than intended, skipping the guard comb on a first body clip, starting with the face before the dog has settled, and never checking the blade temperature all lead to a poor result or an unhappy dog. Beginners should also be wary of using a skip-tooth #7 close to the skin: its wide gaps let skin through as easily as hair, and finish blades are the safer choice until your hand is steady.
If you notice redness, warmth, or itching in the hours after clipping, stop the dog from licking the area, with a properly fitted dog cone if needed, and contact a veterinarian if it does not settle or if there is a nick. Grooming is also the moment most owners first find lumps and bumps; our guide to skin tags on dogs explains which growths are usually harmless and which deserve a vet's attention, but any new lump you clip around is worth mentioning at the next check-up.
Buying Checklist for Clippers for Grooming Dogs
Set your priorities in this order: coat type first, then blade system, then corded or cordless, then everything else. A beginner with a curly-coated dog is usually best served by a detachable-blade clipper that arrives with a #10 blade, plus a set of guard combs for the body and an F blade in the #4F to #7F range added later. A beginner with a small, fine-coated dog can start with a quiet cordless trimmer and a comb set. Anyone with a double-coated dog should think about deshedding tools first and a small trimmer for pads and sanitary areas second.
Beyond the basics, weigh the things you will notice every time you groom. Weight and balance in the hand, noise and vibration levels, whether there are two speeds, cable length or realistic battery run time, and what comes in the box all matter. A clipper that ships with oil, a cleaning brush, a blade guard, and a case is ready to maintain from day one; one that ships with a dozen plastic combs but no replacement blade for a wool coat is less useful than it looks. Prices vary widely between brands and change often, so rather than chasing a number, judge value by the availability of blades and parts and the clipper's suitability for your dog's coat.
Finally, plan for the rest of the kit. Clippers do the bulk of the work, but a finished groom also needs a comb, a slicker or pin brush, round-tipped scissors, clipper oil, and something to trim nails. If you are building a kit from scratch, our guide to pet grooming tools for dogs walks through a safe home routine, and the canine grooming tools guide covers what each tool is for. Buy the clipper for the dog you have, not the dog in the advert, and it will pay for itself in a few grooms.
For more independent, vet-reviewed guidance on this topic, the American Kennel Club expert advice center is an excellent place to start.
Frequently Asked Questions
What is the best blade for clippers for grooming dogs at home?
Most home groomers get the most use from a #10 blade for the sanitary area, paw pads, and belly, plus a finish blade in the #4F to #7F range or a set of guard combs for the body. Finish (F) blades have a full row of even teeth and are safer for beginners than skip-tooth blades. Start longer than you think you need; you can always take a second pass.
Can I use human hair clippers on my dog?
It is not recommended. Human clippers are designed for finer hair and softer skin, so they tend to pull, stall, and heat up on a dense dog coat, and the blade teeth are not spaced for the density of dog hair. A dedicated dog clipper, even a basic one, will cut more cleanly and more safely.
What do the numbers on dog clipper blades mean?
The number indicates how much coat is left behind, and it runs backwards: the higher the number, the shorter the cut. A #40 is surgical and leaves almost nothing, a #10 leaves about 1/16 inch, a #7 about 1/8 inch, a #5 about 1/4 inch, a #4 about 3/8 inch, and a #3 about 1/2 inch when you clip with the lie of the coat.
What is the difference between a #7 and a #7F blade?
Both leave the same length, about 1/8 inch. The plain #7 is a skip-tooth blade with alternating long and short teeth that feed heavy or matted coat quickly, while the #7F is a finish blade with a full set of even teeth that leaves a smoother surface and has less chance of catching skin. For home use, the F version is the safer choice.
How do I stop clipper blades from getting hot?
Keep the blade clean and lightly oiled, work on a clean and fully brushed coat, avoid pressing hard, and take breaks. On longer grooms, rotate between two blades so each can cool, and check the blade against the inside of your wrist regularly. A blade that heats quickly despite oiling is usually dull and needs sharpening or replacing.
How often should I oil dog clipper blades?
Oil before you start and again during the session whenever the blade starts to feel warm or sound different, then clean and oil again before storing. One small drop spread by running the clipper is enough; too much oil drains onto the coat. Use clipper oil made for blades, not spray coolant or general-purpose lubricant, which do not lubricate the cutting surfaces in the same way.
Should I clip with or against the direction of the hair?
Clip with the lie of the coat, from head to tail and from spine to belly, for the length the blade is marked with and the smoothest finish. Clipping against the grain removes roughly one blade size more and is best left for specific areas once you are confident, or for coats that are hard to get even any other way.
Can I clip a double-coated dog like a husky or golden retriever?
You can, but it is usually not the best choice. The undercoat and guard hairs work together to regulate temperature, and clipping can lead to patchy or uneven regrowth. Most owners of double-coated breeds get better results with a deshedding tool and regular brushing, using clippers only for paw pads and sanitary trims. Ask a groomer or veterinarian before clipping a double coat for medical or comfort reasons.
How do I get my dog used to clippers?
Introduce the clipper in short sessions before you ever cut. Let the dog sniff it, switch it on at a distance, then rest the running clipper against a shoulder for a few seconds with praise and treats. Build up over several days until the dog is relaxed, then start with a small, easy area such as the back. Keep sessions short and stop before the dog becomes restless rather than after.
Shop Pet Supplies
Free worldwide shipping on every order. No minimum purchase required.
Shop Pet Supplies →